Home Server
Hardware
The specifications of the computer that I will use for my Home Server is as shown...
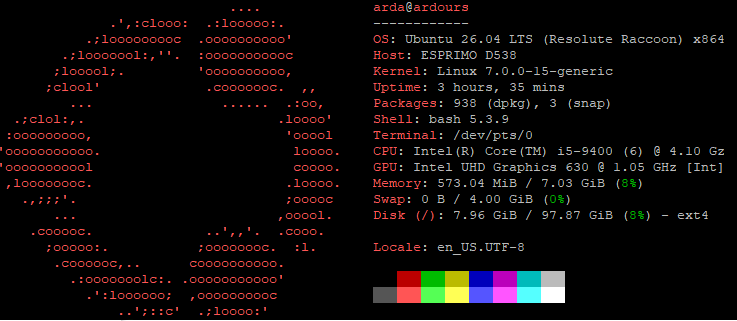 Fastfetch post-creation rip neofetch
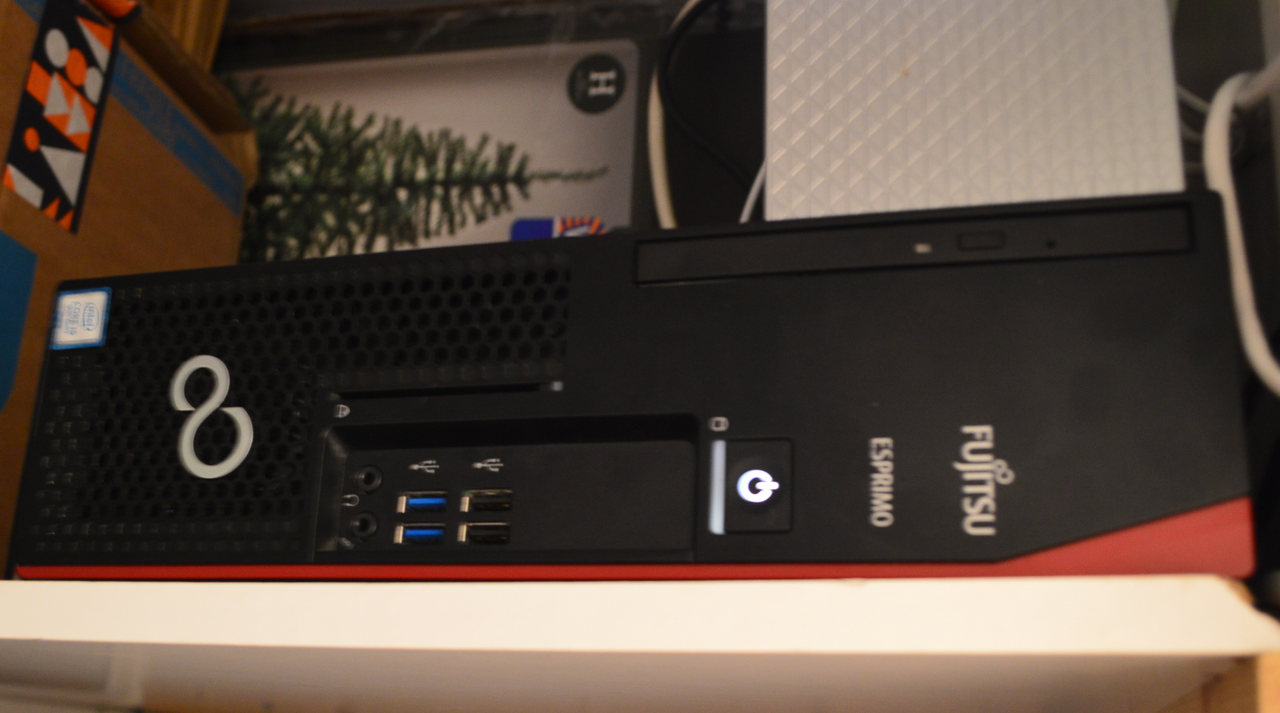
With this build, I have bought a Fujitsu Esprimo D538, however, this computer didn’t come with an initial hard drive, due to the owner taking the hard drives out due to privacy. Luckily, I had a spare 256gb M.2 SSD.
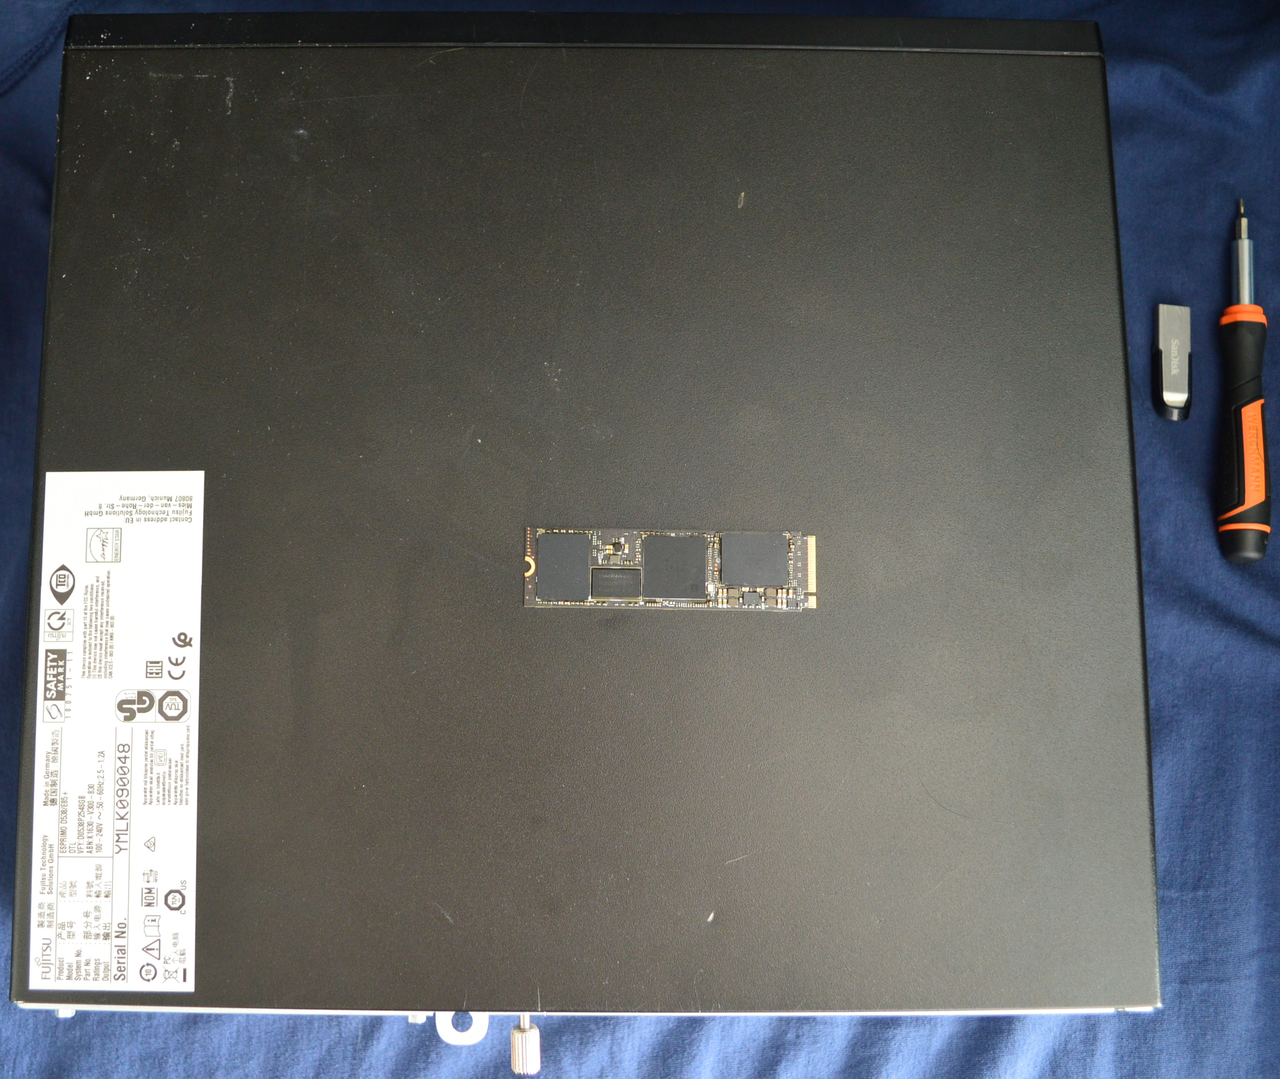 The PC with the SSD on top.
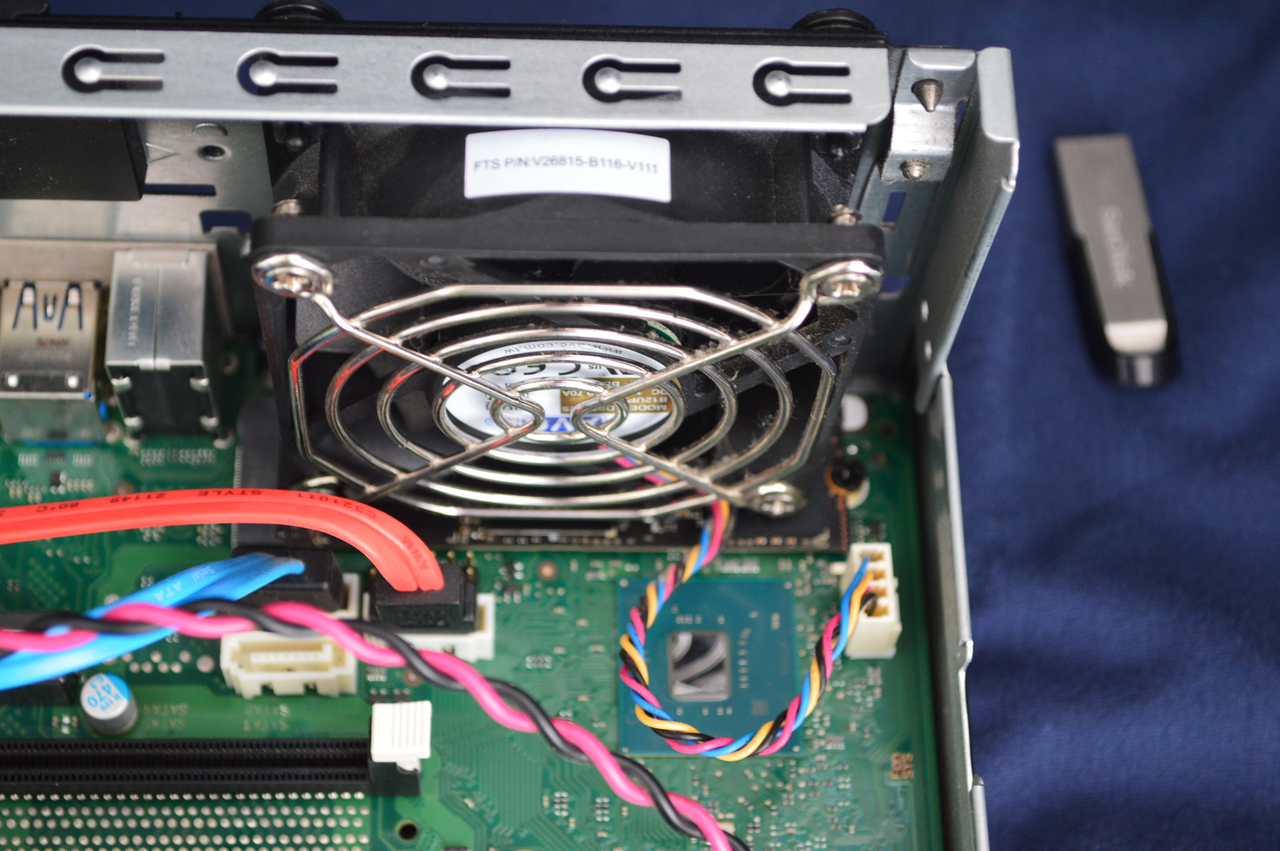
After taking the front cover off, there didn’t seem to be any damage to the internals, however the hard drive was missing (obviously), meaning that I would have to locate the M.2 SSD slot, which was under the back fan.
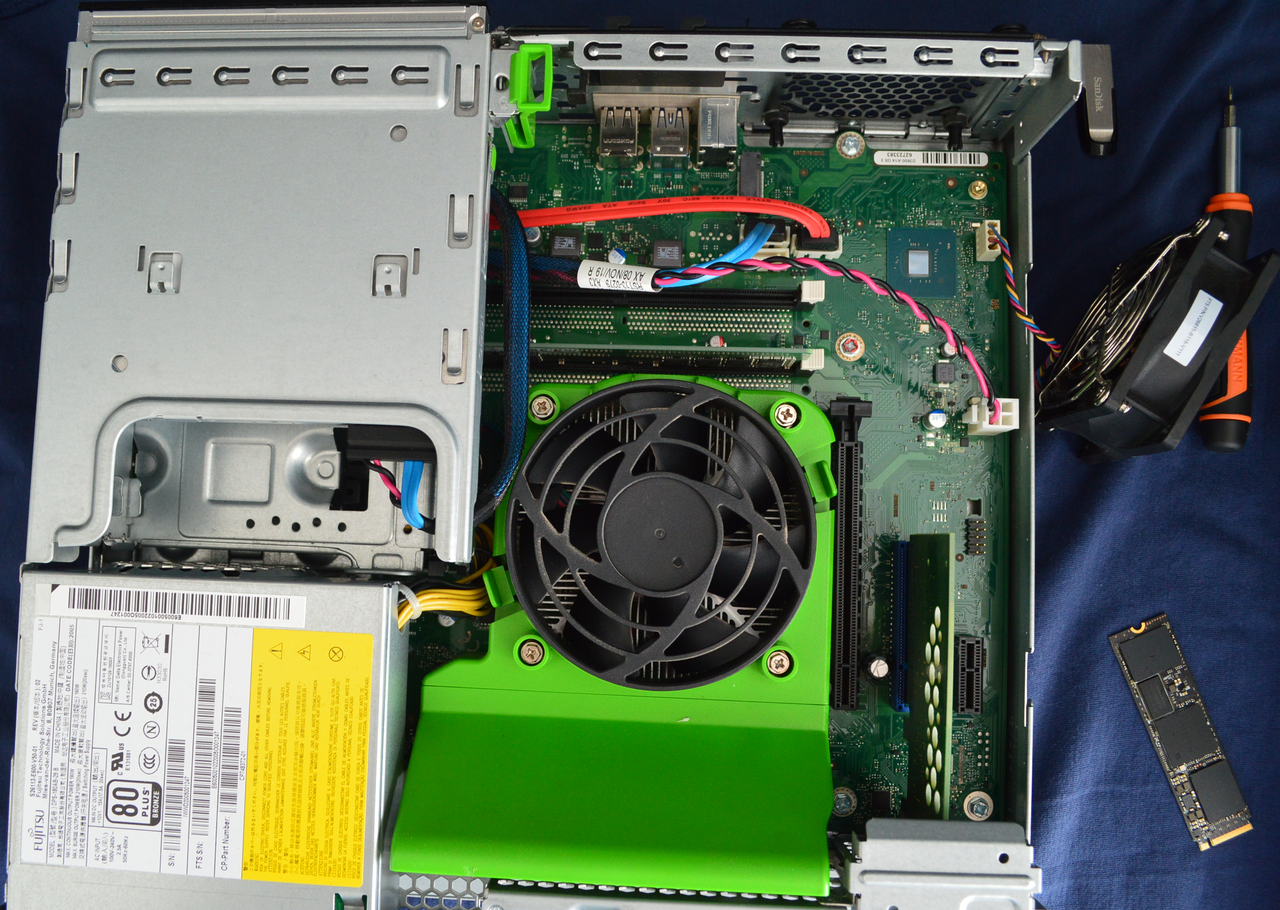 Inside of the Computer, and under the fan
Storage is also an important aspect of home servers, and I intend to upgrade the storage and memory as I go along with my projects, however, the economy nowadays requires me to cough up everything that I own in order to buy storage and memory. Anyways, I had to experiment with screws due to M.2 SSD screws not being one universal screw, and I ended up using the M3x5 screw which seems large; however, the motherboard is somewhat old.
 M.2 screwed on using an M3x5 screw
After applying the storage, I put the back fan back over the SSD slot, and put the pins back in place in order to hold the fan, pretty straightforward.
 Fitting the fan back in place
After booting the computer, I was met with a, not so surprising, red interface telling me that there was no media to boot from, bringing me to my next section, setting up the OS. All in all, the hardware cost me around 50 Great British Pounds, 40 for the computer, and 10 for the storage.
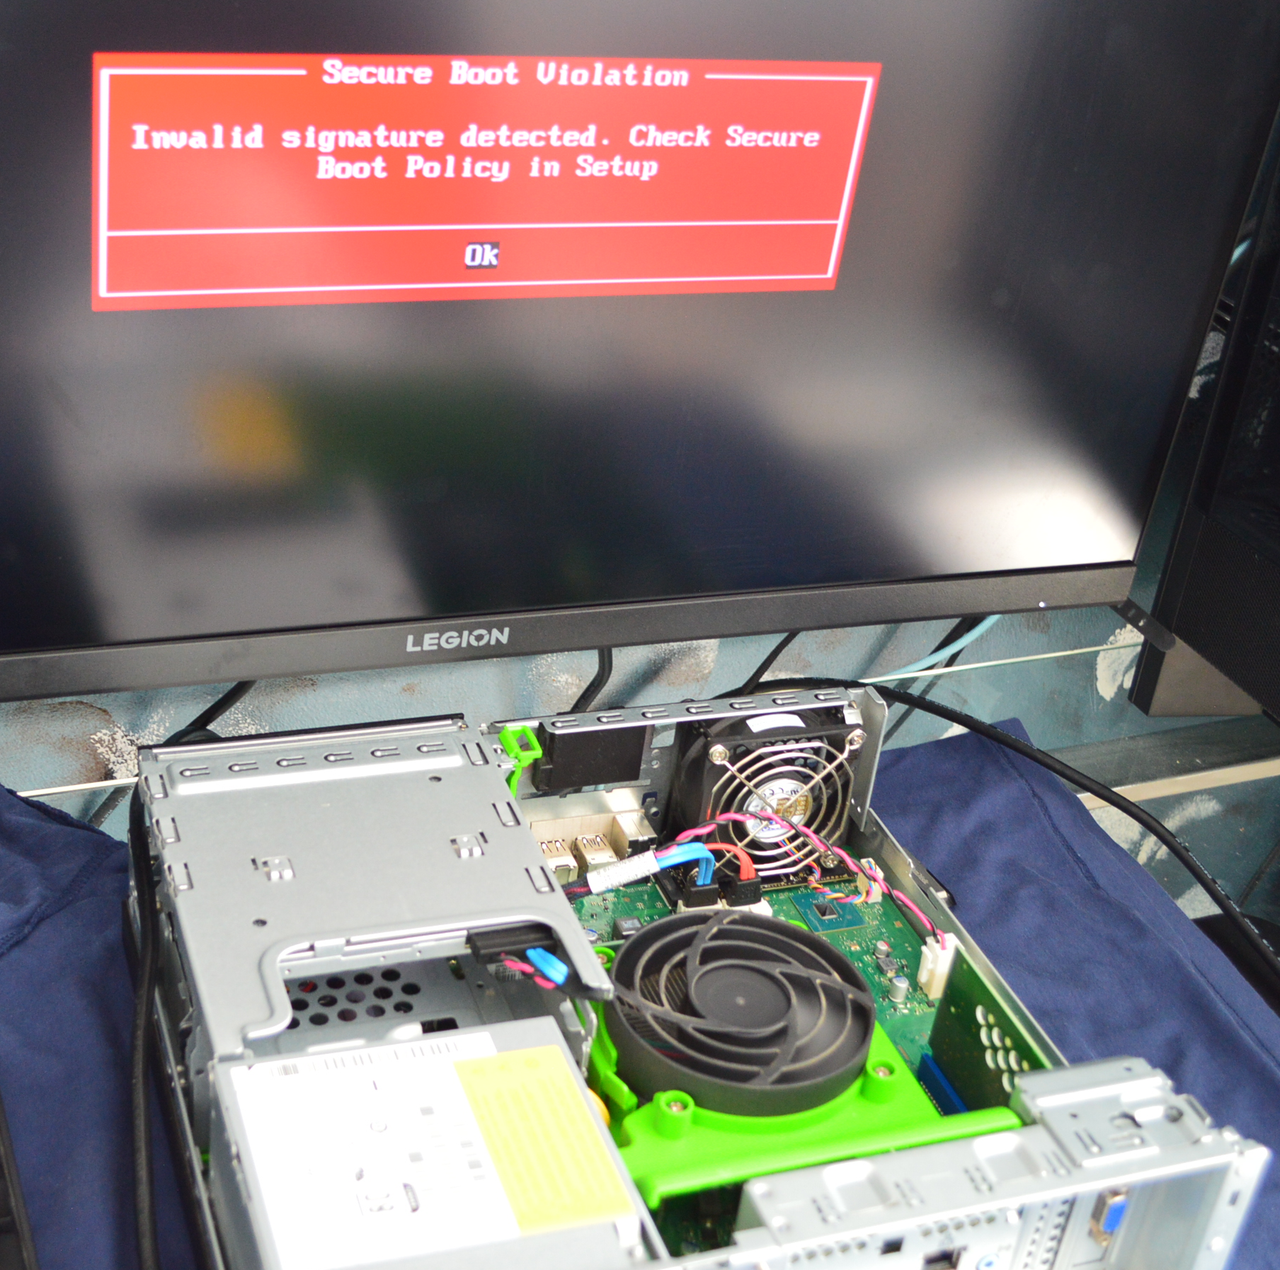 Fujitsu working without an OS to open
Setting-Up
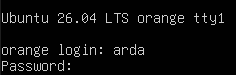
If you're one of the unlucky people who were unable to get OpenSSH running due to a lack of internet, but now have it working by connecting your phone to your PC and providing ethernet-like internet to your PC by using USB-tethering, I’m happy to announce that you are in the right place, the first section of this place will be based on installing OpenSSH, and ensuring that nothing interferes with OpenSSH, which also applies to people who were able to install OpenSSH beforehand.
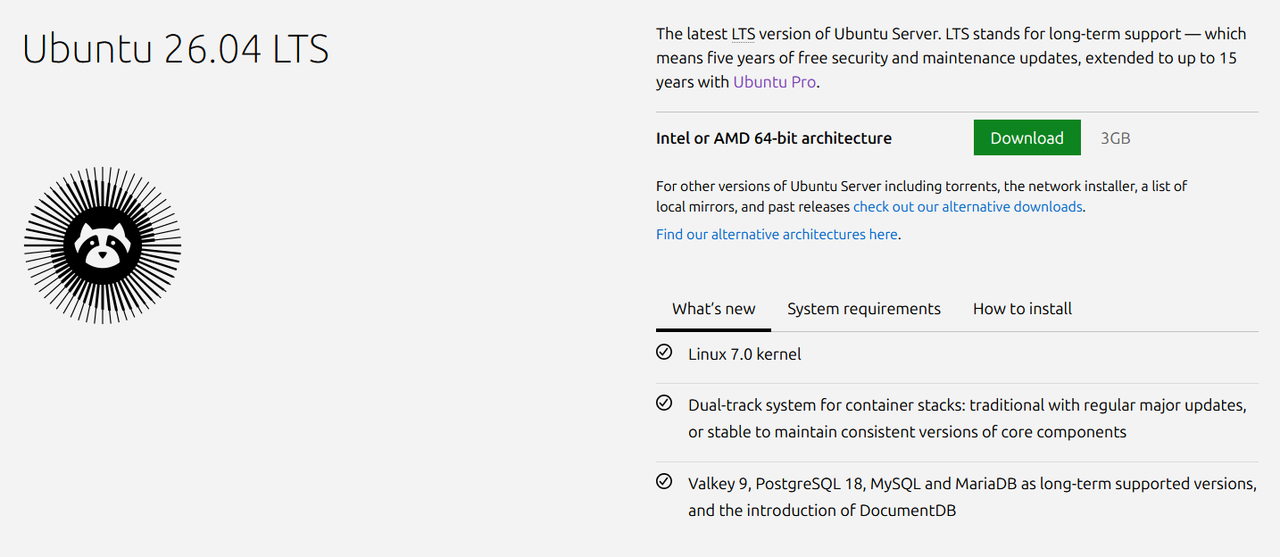 Ubuntu Server downloader
After installing the ISO, you will need to install an application that allows you to burn the ISO into the flash-drive, allowing the drive to work as a bootable source, like those old windows discs. For this, I have chosen to use rufus as I am on Windows, if there are people out there trying to install Linux on Linux to use Linux with Linux, you can simply use balenaEtcher.
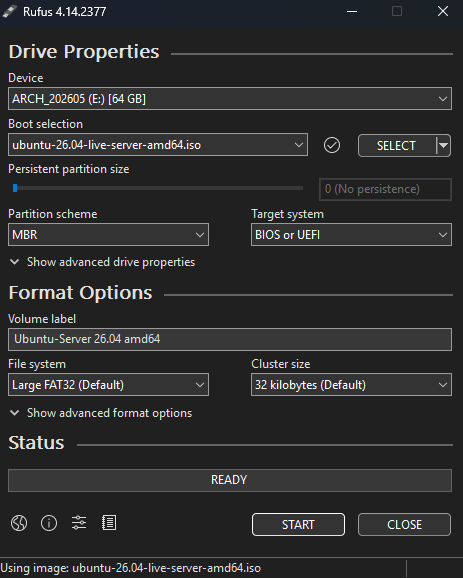 Rufus with Ubuntu Server before being downloaded (I use arch btw)
Although some people would struggle in order to download Linux due to booting orders (I didnt have to do this), you can go into your BIOS to put the USB that you have burnt the ISO image into as the selected boot method.
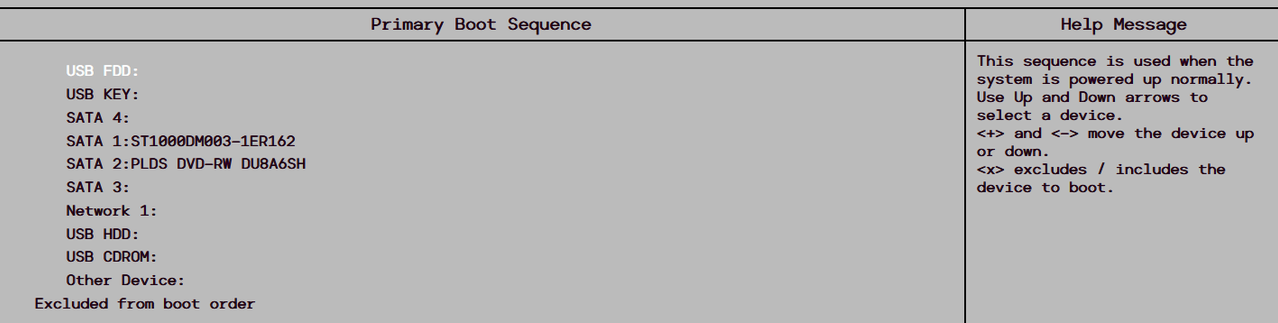 Bios of a lenovo computer
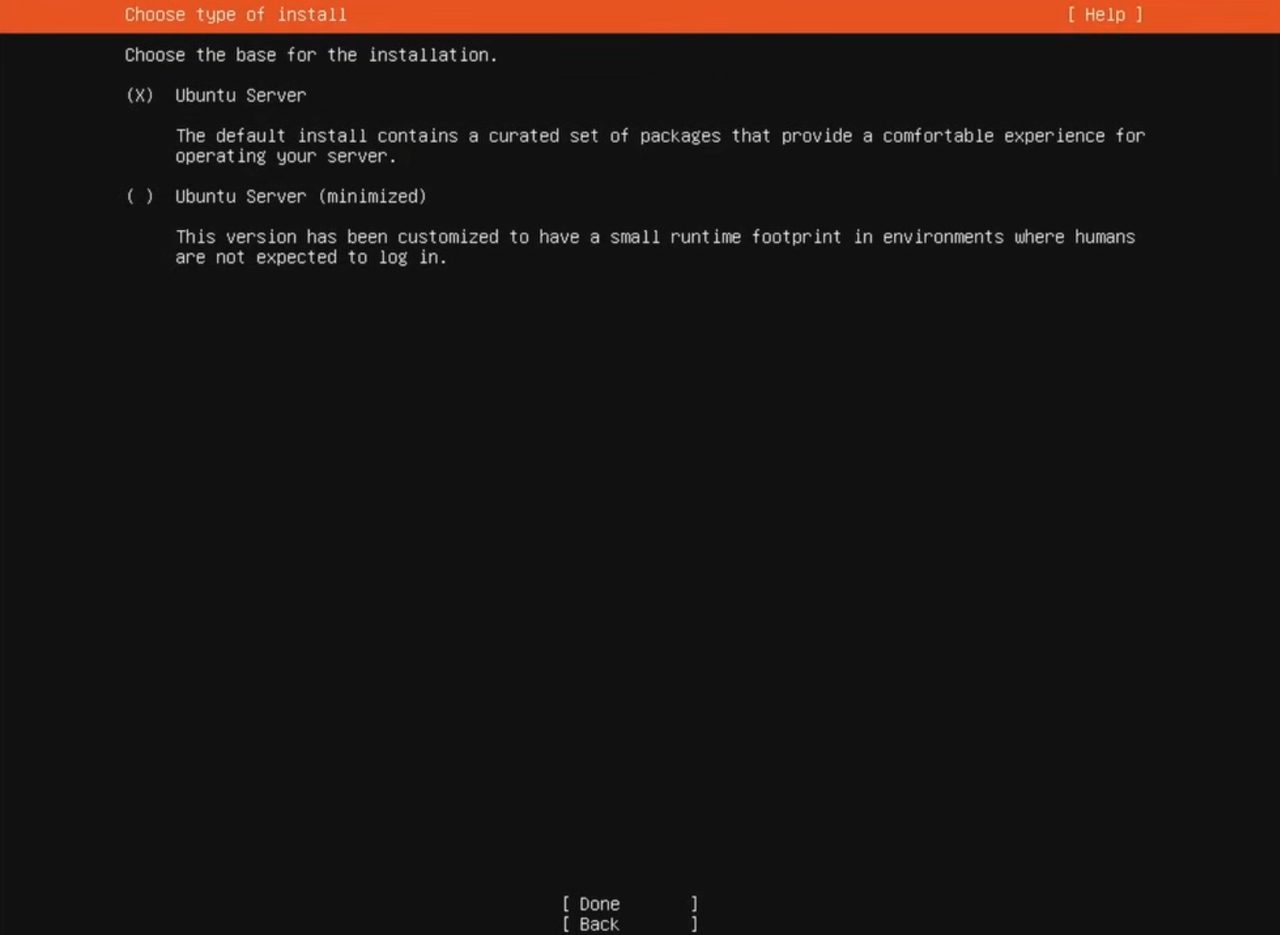
After installing the first part of Ubuntu Server, you have to choose your preferred language, keyboard layout, and what type of Ubuntu you want, I chose the standard Ubuntu Server rather than Ubuntu Minimized, I don’t know what it does, and I couldn’t be bothered to try it. From here, if you do not have ethernet, or are currently unable to connect to ethernet, until you get the opportunity to run whatever you need to do in order to connect to Wi-Fi, you can use USB tethering from phones in order to connect your server to the internet. I also skipped the Proxy and Mirror address, and used my entire disk, I then chose my booting SSD, and adjusted the storage on the SSD, for which I had to create a profile to log in from. You will be asked to provide your username and password when you finish installing Ubuntu Server so remember what you write.
 Ah yes, the freedom of choice
With the SSH setup, you can choose to install OpenSSH server if you have internet, or you can leave it for when you connect to the internet.
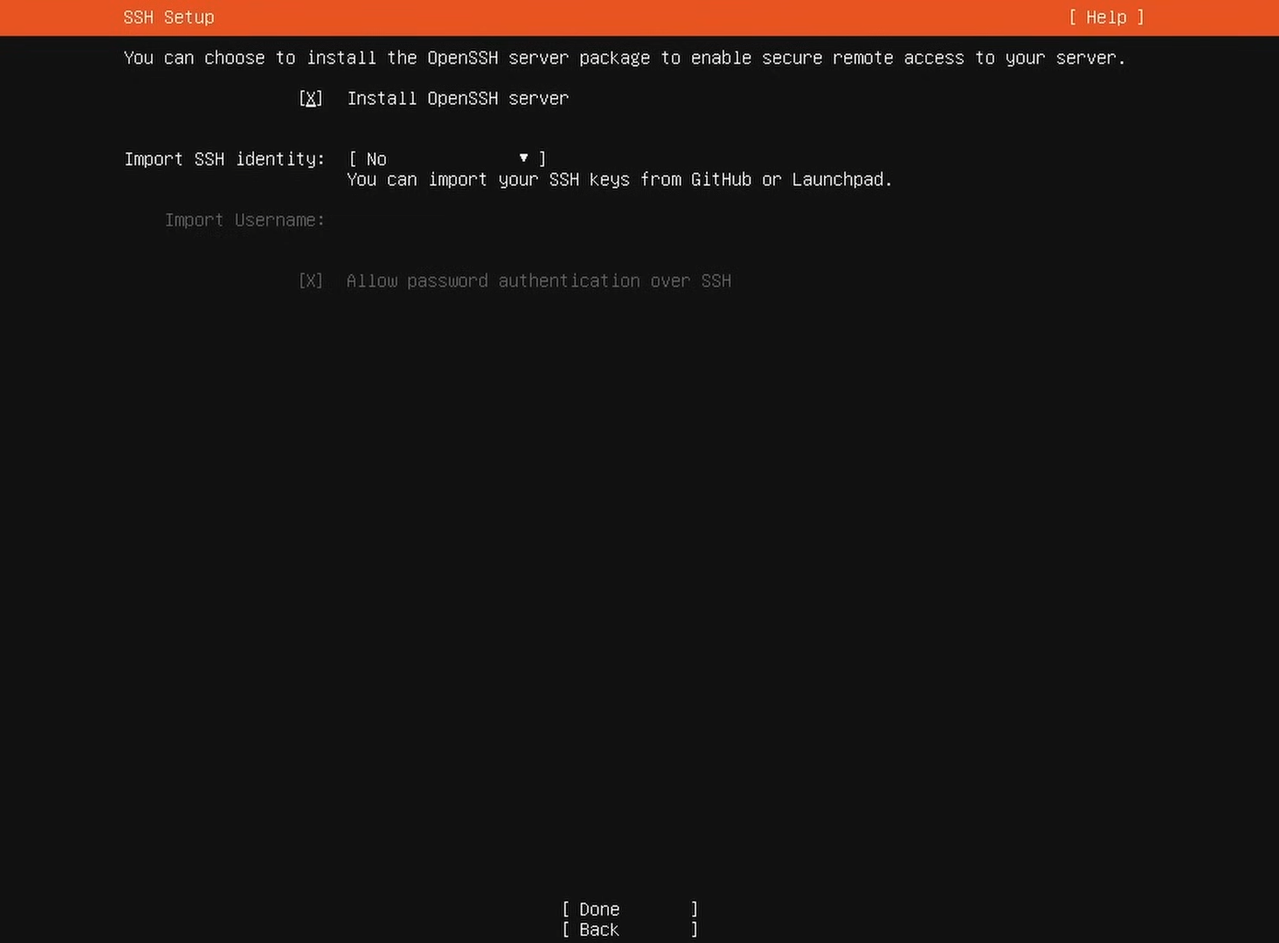 Picking whether you wish to get OpenSSH now or later
After this, you will be shown a screen of the system installing Ubuntu Server onto your SSD, which then you will have to reboot your system, and once the computer opens, you will be prompted to disconnect the ISO USB, and press enter, booting you into Ubuntu Server.
 Don't share your password and e-mail with strangers
OpenSSH
If you're one of the unlucky people who were unable to get OpenSSH running due to a lack of internet, but now have it working by connecting your phone to your PC and providing ethernet-like internet to your PC by using USB-tethering, I’m happy to announce that you are in the right place, the first section of this place will be based on installing OpenSSH, and ensuring that nothing interferes with OpenSSH, which also applies to people who were able to install OpenSSH beforehand.
 OpenSSH banner
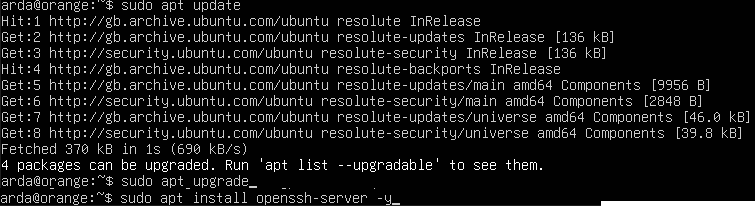
Firstly, in order to install OpenSSH on your Home Server, you would need to update your device, this can be done through “sudo apt update” and if there is anything that isn’t updated, you can write “sudo apt upgrade”. Then, after installing the updates needed to install OpenSSH, you can install OpenSSH, this will be done through the code “sudo apt install openssh-server -y”
 Updating, Upgrading, and Installing SSH
Secondly, after installing OpenSSH, you would need to ensure that nothing gets in the way of the connection, this also includes the firewall, of the Ubuntu Server, this will be done through “sudo ufw allow ssh” in order for OpenSSH to bypass the firewall, then use “sudo ufw reload”.
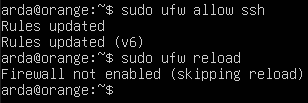 Bypassing firewall for SSH
After doing this, put down the following code into the Home Server: “ip link” this code will help you find what name your Ethernet/Wi-Fi is. In my case, my Ethernet’s name was enp1s0, after this, you have to run “ip -4 a show dev enp1s0”, in order to obtain your ip address.
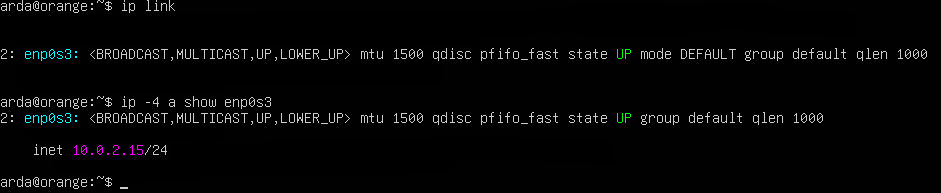 Finding my ethernet name and IP done in a VM
Finally, after getting the Home Server’s IP address, you can now go to Terminal in order to try and connect to the Home Server remotely, pasting the following command: ssh Your-Username@IP-you-found from which you will be asked to log in, which will consist of the username you initially put on the server, and the password alongside it.
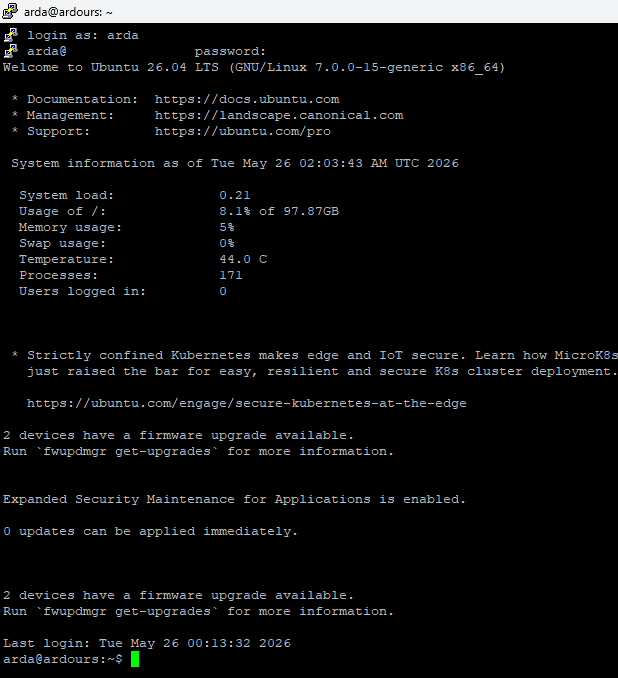 Accessing my Server through my main PC
Side-Note: You can install PuTTY in order to automate this process, rather than constantly pasting “name@ip-address” saving time for servers.
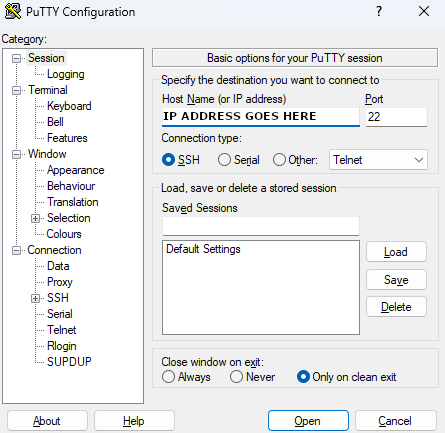 PuTTY GUI
Finishing
This is the end of the project, if you followed everything to a T, then you should have a fully functional server running on your main computer, and a server running on an old computer linking to your main computer, Ardours is proud of you.
 My server running in my router room